

A STEP-BY-STEP GUIDE
Properly measuring gymnasium walls is key to ensuring your wall pads look professional and fit perfectly. With endless wall configurations, following the right steps will give you the best results. Here’s an easy-to-follow guide that will help you measure like a professional. TOOLS NEEDED:- Measuring tape (100')
- Camera phone
- Pencil or pen
- Printed photos
- Hand drawing of the wall or stage
STEPS TO MEASURE
- Prepare the Space
- Clear the area: Remove any old pads to expose the wall.
- Bare walls work best: A clean, unobstructed surface helps guarantee precise measurements.
- Measure the Coping
- Coping height: This is the protective strip where the gym floor meets the wall, typically between 4 to 6 inches tall.
- Document it: Measure from the gym floor to the top of the coping and record it.
- No coping? No problem: If there’s no coping, start your measurements at ground level.
- Standard pad heights: Most pads come in 5 ft, 6 ft, or 7 ft sizes.
- Measure from Left to Right
- Start on the left: Begin at the left side of the wall and work your way right.
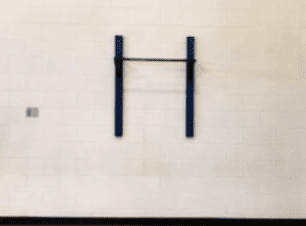
- Watch for obstacles: Note down any outlets, bars, or other items that might affect the installation.
- Detailed Measurements Around Obstacles
- Precision matters: Measure right up to the edges of any obstacles.
- No guesswork: Our CAD team will automatically add a ¾ perimeter around obstacles, ensuring a snug fit.
- Intersecting walls: If your gym has intersecting walls, make sure you note where they meet so the pads can be adjusted accordingly.
- Return Corners
- Corners count: Don’t forget to measure both sides of any return (the portion covering a corner).
- Note extra features: Columns, bumps, or oddities in the wall? Mark them in your sketch to ensure perfect pad placement.
- Repeat for Each Wall
- Consistency is key: Follow these same steps for every wall in the gym, even if they seem similar.
- Submit Photos or Drawings
- Visual aids: Attach photos or hand-drawn sketches along with your measurements to help clarify your setup.
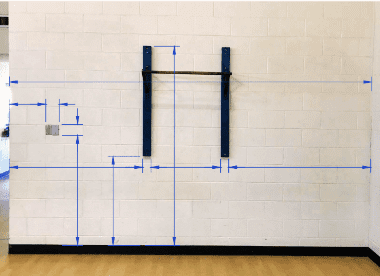 The above image is an example of how to measure for your wall pad.
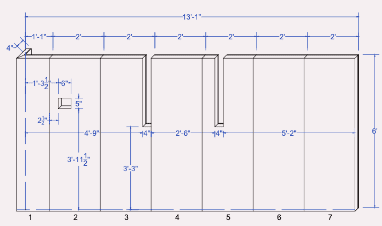 The above image is an example of the CAD drawing you will receive for confirmation, based on the measurements you provided.
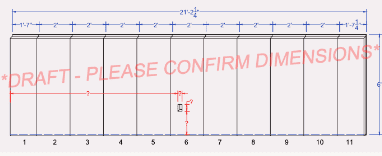 NOTE:
You may receive a drawing with red dimensions (see image above), these dimensions will need to be re-verified before becoming an order.
NOTE:
You may receive a drawing with red dimensions (see image above), these dimensions will need to be re-verified before becoming an order.Share this article
Tags:gym wall paddinggymnasium wall paddinghow to measure wall padding
Related Articles
BaseballBatting Cages
How to Store a Retractable Batting Cage Net: Step-by-Step Guide
Aug 20, 2025·3 min read
BaseballBatting Cages
Pro Guide: Outdoor Batting Cage Installation Kit in 8 Steps
Aug 18, 2025·6 min read
Customer SpotlightInstructions
Indoor Slide Installation: How to Build a Tube Slide (5 Steps)
Aug 16, 2025·5 min read